Author Topic: A Simple Texturing Tutorial (Warning to dialup users!) Updated with more goodies  (Read 93797 times)

0 Members and 1 Guest are viewing this topic.

A Simple Texturing Tutorial (Warning to dialup users!) Updated with more goodies
Well I wrote this about 3-5am this morning so take heart LOL.

Starting Out
Start with a base texture. I use a 2048*2048 texture, makes it easier to do painting high res.


Next I use texporter's output, if your using some other program than Max, you'll need to do it some other way. but you'll need a black and white outline of the uvmap
Settings Are:
  • Image size 2048*2048 [match this with the desired texture size]
  • Just edges no polygon fill (use edges only, all lines is too messy)
  • No backface culling or marking overlap  (marking overlaps can be used to indicate possible problems though)
  • No smoothing colors
  • Use constant and use a pure white color


Save the results to a file and make sure to use bmp or at least use lossless formats only.


Now load that file into photoshop or whatever you use.
Either copy that layer into your base texture (or drag and drop that layer) and then change the outline layer to lighter or linear dodge (as long as you only see the white outlines)


Panelling
Time to start creating the panels.  I base my big panels on the shape of the ship. Imagine what a good removeable panel would look like (sorta like car hoods, engine hoods...etc) For the lines I use a black line, 1 pixel width.  It is also a good idea to have them all in one layer (join mode), otherwise you'll have a couple dozen plus single vector lines. I then go to layer style for the lines and activate Bevel & emboss, set style to outer bevel, and give a size of about 2-3px.  Use the white outline that texporter made to guide you. It's a processes of adding a few lines, saving and viewing and repeating.

Ok heres the result.  This model doesn't have a whole lot of panelling


Detailling
Now add detail textures (engines... and fancy stuff...etc). Sometimes its easier to change the UVmap rather than the textures (the engine glow in this example) A lot of the textures come from freespace and descent.  Sometimes adding two different textures together can produce another new one, other times using only a tiny section of one texture works. Don't forget you can change saturation/hue or even desaturate the texture.  Also don't forget you can use a texture overlayed over another one using one of the overlay modes. (Transparencies) Usually I have the 3d model in view and use ACDC to cycle through all the textures looking for something X that could go on spot Y.

Another hint for the photoshop users, use layer sets! It'll save you a lot of frustration when you have several dozen layers.


Next lets add some dark panels around the cockpit area and a few other sections...
Simply create a new layer.  Use the selection tool and draw out the area in question then flood fill. Afterwards lower the transpancy on that layer so you can just kinda see the details underneath it.


I decided the panels were too dull and large so I added a second line layer, using 1px line and 1px beveled outline and dropped the transparency to about 50%.


Next step is to add suttle panel color changes.  This gives the appearance that some of the panels were taken from another ship or brand or weathered.  Create a new layer. Theres two ways to do this, first way, you may need to hide the background, in my case it isn't necessary. Switch to flood fill, select opacity at 3%, make sure contiguous and all layers is selected. Select a panel, then flood fill it.  Select another panel and repeat... change the number of times you flood fill.. this will give a random tint.  If you find out that its filling the entire map.  Undo and use the second method.. first select the panel area and then flood fill. 

Optional parts: on some models, fighters mostly you can add rectanglur knotices and/or rivets just remember they will not show up much in the ingame version. 

Here are the results.  With this texture base the results are very suttle.  If you have a more uniform base texture then it'll show up better


Now comes the fun parts... making it dirty.  At this point memory usage is going to rise quickly.

First thing is to add a layer of overlay grim. It would be wise to create a new layer set (if available) for all the grim layers.  Create a new layer.  Make sure black and white are the colors and do a filter->render->clouds. Layer style use multiply and drop the opacity down to about 50% or less.


Dirty corners.
Now we're going to add slight shadowing corner areas.  Create a new layer set to darken at about 40% opacity.  Switch to brush and set to a blurry brush app 65px (use whatever settings best suits the situtation, just keep it blurry).  Find creases and sharp inward corners on the model and just roll the brush through that area making sure that about half of the brush is actually getting the area.  This is suppose to be a slight darkening. In this example, the base of the rudders, the hull area right in front of where the wings attach.


Battle Damage
You will need to do this in either two steps or one depending on how things are mapped out.  If all your uvmaps are going horizontal or vertical, then you can do this in one step. If you have some verticle and some horizitonal then you need to do each seperately. By horizontal/vertical i mean lets take the wings for example, in this case the front of the wing is horiztonal to the rear of the wing. Same with the main hull, however the rear hull isn't.  the front of the back section is vertical to the very rear.  Basically if you can draw a line(s) horz/vert across everything and they all appear the same direction on the mesh then everythings the same.  The reasoning for this is the blast marks need to go from front to back.  If you do everything the same way and their not aligned the same way you will end up with blast marks going from front to back and from side to side.

Ok first create a another new layer, set the style to multiply.  Select brush with some odd shaped brush style, leaves, rolled rag..etc about 90px or so.  Smear from front to back (or back to front) the brush across parts of the model, not huge smudges just odd random sizes. Do be careful around areas where there will be symetry in the model, otherwise the results will look too mirrored.  Next filter->blur->motion blur.  Set it to go horz (0 deg) and about 130 pixels.  This makes a large strecked blurry mess.  Now we need to scratch up those blurrs.  Use noise->add noise (monochromitic), try filter->texture->Grain (use vertical).  Also try angled strokes and splatter.  Play around, you'll want a scratched up blackish blur.  Once you've gotten a gritty mess, go back and select motion blur again, but this time use 45 degree angle and a much smaller blur pixel.  Once thats done, motion blur again, back at 0 and a nice large pixel number.  The 45 degree motion blur helps get rid of any streaking. Repeat the process for the parts that are going perpendicual to the what you just did.

You can repeat this process using smaller blobs and creating sharper blast marks.


Grease stains
One final step comes straight from modelling WW2 aircraft.  Creating grease/oil/rust streaks.  Create a new layer, position this layer below any of the details.  Switch to a smallish blurred brush and where ever there is a vent or something that could get rust or streaks, paint a smudge of black paint there.  Then switch to the smudge tool, select a similar sized odd shaped brush and smear the black blob in the right direction (usually going back or down on the model)  Once done, use motion blur to blur it out more. You might end up having to move the smear and possible drop transparency down.

One last darkening you can do is select the detail (it should be on it's own layer) go to the layer style.  Use outer glow and replace the color with black and switch the blend mode to darken (so it actually shows up)


Right now it could use some more detailing.  Try photoshops vector symbols to get arrows, warning marks... etc.  Be careful with text though, especially if that area is symetrical on the mesh, one side the text will appear reversed like in a mirror.

Adding glow maps is another topic all together.
« Last Edit: June 21, 2008, 02:59:31 am by Scooby_Doo »
That's cool and ....disturbing at the same time o_o  - Vasudan Admiral

"Don't play games with me. You just killed someone I like, that is not a safe place to stand. I'm the Doctor. And you're in the biggest library in the universe. Look me up."

"Quick everyone out of the universe now!"


Offline Taristin

  • Snipes
  • 213
  • BlueScalie
    • Skelkwank Shipyards
Re: A Simple Texturing Tutorial (Warning to dialup users!)
Awefully good of you to take the time to write this. If it gets more good response, I'll sticky it.
Freelance Modeler | Amateur Artist


Offline RazorsKiss

  • 28
  • The Cutting Edge
    • RazorsKiss.net
Re: A Simple Texturing Tutorial (Warning to dialup users!)
 :eek2:

That, sir, is absolutely cool.
Fringespace - Tachyon: Revived   ModDB Listing   Razorskiss.net 

You only think you can outfly me.


Offline Turey

  • Installer dude
  • 211
  • The diminutive form of Turambar.
    • FreeSpace Open Installer Homepage
Re: A Simple Texturing Tutorial (Warning to dialup users!)
very, very nice.  :yes:

Bookmarked.
Creator of the FreeSpace Open Installer.
"Calm. The ****. Down." -Taristin
why would an SCP error be considered as news? :wtf: *smacks Cobra*It's a feature.

 
Re: A Simple Texturing Tutorial (Warning to dialup users!)
NICE =D Are those Descent 3 textures you stole there?  :drevil:

 
Re: A Simple Texturing Tutorial (Warning to dialup users!)
Yup I even mentioned it that some come from freespace, descent, off the net....  I'm not good enough at photoshop to make those type of textures.

Up next..... glow map tut.  using this model (BTW this is the Stalker strike bomber, modeled off of the Privateer 2 Karnenan)

Quick question... in photoshop how do you take a grey/black scale image and turn it into a colored image like red
« Last Edit: November 07, 2006, 11:15:01 pm by Scooby_Doo »
That's cool and ....disturbing at the same time o_o  - Vasudan Admiral

"Don't play games with me. You just killed someone I like, that is not a safe place to stand. I'm the Doctor. And you're in the biggest library in the universe. Look me up."

"Quick everyone out of the universe now!"


Offline Nuke

  • Ka-Boom!
  • 212
  • Mutants Worship Me
Re: A Simple Texturing Tutorial (Warning to dialup users!)
not bad, but i must ephasize the usage of the noise and motion blur filters together to create metallic textures. using alot of noise (non-monochroimatic) on black, with 1-2 points gaussian blur and motion blur makes a good glass or shinemap for glass effect.

another thing i also do is keep the individual layers grey and add tiling with the pattern overlay layer style. layer styles are your friend. some texturers hate using layers but you can do so much with them. i never collaps, if you collapse youre making shine glow and env maps that much harder to do. i either pur all my layers in a layer set, duplicate it, and alter it after im done, or if its high resolution texture, il save a copy and edit the copy one layer at a time. most of the time its just a matter of tweaking the layer effects.

another trick when making shine or env maps, on shiny surfaces i like to copy them merged in the shine map and flip em in the env map, that way you get less reflection on sectionss that have alot of change on the specular chanel and areas which are not effected much on specular will be brighter on the env map so the reflect more. dont be affrait to reduce contrast on the env map, a softer variation tends to look better. also for envs it may be preferable to copy+paste one chanel from the diffuse or shine rather than all of them. if you want one color to be more reflective than another.
« Last Edit: November 08, 2006, 12:57:30 am by Nuke »
I can no longer sit back and allow communist infiltration, communist indoctrination, communist subversion, and the international communist conspiracy to sap and impurify all of our precious bodily fluids.

Nuke's Scripting SVN


Offline Nuke

  • Ka-Boom!
  • 212
  • Mutants Worship Me
Re: A Simple Texturing Tutorial (Warning to dialup users!)
Yup I even mentioned it that some come from freespace, descent, off the net....  I'm not good enough at photoshop to make those type of textures.

Up next..... glow map tut.  using this model (BTW this is the Stalker strike bomber, modeled off of the Privateer 2 Karnenan)

Quick question... in photoshop how do you take a grey/black scale image and turn it into a colored image like red

open a new rgb image and paste it into the red chanel, its on the same panel as layers.
I can no longer sit back and allow communist infiltration, communist indoctrination, communist subversion, and the international communist conspiracy to sap and impurify all of our precious bodily fluids.

Nuke's Scripting SVN

 
Re: A Simple Texturing Tutorial (Warning to dialup users!)
I'm stilling trying to figure out your style
Not to mention if you collapse, then glow maps can be more difficult if you have glowing textures.

Yup I even mentioned it that some come from freespace, descent, off the net....  I'm not good enough at photoshop to make those type of textures.

Up next..... glow map tut.  using this model (BTW this is the Stalker strike bomber, modeled off of the Privateer 2 Karnenan)

Quick question... in photoshop how do you take a grey/black scale image and turn it into a colored image like red
open a new rgb image and paste it into the red chanel, its on the same panel as layers.

That didn't work... however pasting to G and B channels did create a red version   :)
That's cool and ....disturbing at the same time o_o  - Vasudan Admiral

"Don't play games with me. You just killed someone I like, that is not a safe place to stand. I'm the Doctor. And you're in the biggest library in the universe. Look me up."

"Quick everyone out of the universe now!"


Offline Nuke

  • Ka-Boom!
  • 212
  • Mutants Worship Me
Re: A Simple Texturing Tutorial (Warning to dialup users!)
or you can just use adjust hsb, and use the colorize checkbox.
I can no longer sit back and allow communist infiltration, communist indoctrination, communist subversion, and the international communist conspiracy to sap and impurify all of our precious bodily fluids.

Nuke's Scripting SVN

 
Re: A Simple Texturing Tutorial (Warning to dialup users!)
That was my first attempt... the results were far less pleasing as using the channels.
That's cool and ....disturbing at the same time o_o  - Vasudan Admiral

"Don't play games with me. You just killed someone I like, that is not a safe place to stand. I'm the Doctor. And you're in the biggest library in the universe. Look me up."

"Quick everyone out of the universe now!"


Offline aldo_14

  • Gunnery Control
  • 213
Re: A Simple Texturing Tutorial (Warning to dialup users!)
I'm not sure if I ever posted this here

Quote
Offhand, my texturing is done over several layers; I don't do tiles nowadays, but the basic template tactics work with minor changes...offhand;

1/ base layer; colour segmentation

2/ shading/noise layer.  Basic light/dark shading combined with 5 noise and 2 pixels motion blur.

3/ colouration layer; overlaid colours (colour blend); this is more relevant for templating

3.5/underlay; I've just started experimenting with this; basically some form of abstract shape 'under' but on top of the colouration layers.  for tiled textures, try overlaying lots of thick rectangles of 20 thickness, at about 10% black or 5% white - this is sort of a B5 effect which adds a nice breakup to the surface

4/ white shading layer; about 10-20% opacity of shading using a round brush

5/ black grain; 20-30% opacity using a black grained (i.e. pixellated) brush.  This generally is used to cover up the white areas once 6 is done

6/ black shading; 30-40% shading, the 'inverse' of white.

7/vthin white; 4% or so very fine detail in white lines.  Just a surface breakup effect - usually take layer 8, invert it and shift 1 pixel to the side and down.

8/vthin black; very low opacity (5% ish) black lines filling in the gaps of the other more visible panelling lines.  This is a pain in the arse to do, and the actual value is debatable.

9/thin white; manually drawn white-offset lines to L10; about (IIRC) 10%

10/thin black; thin panels in between the thick lines, about 20-30%.  This is the lowest level of visible panelling

11/rust; brown 'star' paintbrush effects under the thickest lines, usually a burn layer at about 5-15%

12/charcoal; this is rather an odd one; basically take a medium thick black round brush, 'trace' round under the thickest lines, apply a charcoal effect and set to about 10-15% opacity

13/thick-1pt white; about 20-30% opacity white, tracing layer 14

14/thick-1pt black; 55-70% opacity black, tracing thinner but still very visible lines between the plates defined by 16; this usually follows the template lines so it's marking polygon edges.

15/thich-2pt-white; actually a 1pt white line at 20-30% opacity which traces 16

16/thick-2pt-black; black 2-point lines forming the edges of the primary hull plates.  Highly visible, and must be used sparingly for effect.  About 60-80% opacity.

16.5/
Additionally, I sometimes add a layer under the rivets.  this is basically a brown star under each rivet position, blurred and low opacity.  i'm not sure if it's necessary, though.

17/rivets; manually drawn rivets across the sides of the 16 lines (this is why we use 16 sparingly, and even then you only want a limited number of rivets).  Basically, take a suitably sized round white brush, and draw a circle with it (dot).  Then take the same size brush, make it black, and dot on top of the existing white circle very slightly offset.  And you have a nice rivet.  Set to about 90% to avoid it being too stark.

18/solids; stuff which isn't drawn layered but all in one do to be visually distinct.  I.e. gun barrels, engines, etc.  Drawing these is really a combination of the previous layers work on a single layer; for example a gun barrel is usually shading + noise + low opacity overlapping rectangles + some lines + white overlay + brown overlay + burn (latter 3 use a grainy brush).

19/ highlights; this is a new one for me; it's only seen on the Claymore so far.  Basically, take a white star brush and apply it across the lighted parts of the ships.  Set the layer to overlay (er, I think; might be multiply) and between 30-60% opacity to taste.

20/highlights 2; brighter version of 19; used sparingly for key parts.

21/paint; labels, decals, etc.  Draw to taste, select, apply some noise (or manually add white + black grain), then set to about 50% opacity.  finally, take an eraser (grain) and go about selectively removing the labels as if they'd been scored away etc.  You may want to move this down to under the thick plate layers.

22/text; as for paint; if we have the maps set out for this, apply some text using the same method as 21.  Yay!

23/Damage; damage effects like burns, scrapes, bullet-marks.  for bullets in particular; take a white 'star' brush, place it on the map.  Then place a black star on top slightly offset.  Looks lovely.  Might want to blur and set to about 80% opacity so it looks best.

24/glow soft; multiply blurred glow imitating lighting effects.

25/glow hard; solid glows.  i.e. bright red solid blocks for lights, etc.  Sometimes soft glows next to missile bays, etc.  Also engine glow effects.

26/ drawing aid; keep a copy of the map template in wireframe, sans the white bits (duh; i.e. so it's only the lines), low opacity and use it as an aid for the lines, etc.

Phew.  Rough principle I follow is really simple; at the end, you want to make sure no pixels have the same colour as their neighbours.  Obviously that's not a strict rule, but it's a good guide to get a nice mix of detail.  also, as with the vthin lines etc, you need to add incredibly subtle stuff to get the best effect overally.

I'll try and see if I can find a recent map which is small enough to upload as an aid, but I doubt I'll have one; they normally are rather huge in PSD format IIRC.

EDIT; claymore render; http://www.sectorgame.com/aldo/media/gtf_claymore.jpg - you can see some of the line mix, the highlights and the little decal scrapes etc here.  hopefully.

Bear in mind, though, this was a render with spec-maps, etc, so the actual model-map is somewhat less, um, 'vivid'.  Particularly RE: bump maps.

I've changed a tiny bit since writing that; use a couple of extra layers for more shading work, another line of top level surface detail, and to draw individual rivets.


Offline Colonol Dekker

  • HLP is my mistress
  • 213
  • Aken Tigh Dekker- you've probably heard me
    • My old squad sub-domain
Re: A Simple Texturing Tutorial (Warning to dialup users!)
I like this Tutorial, Very  comprehnsive.
three thumbs up  :yes: :yes: :yes:

Any tips on which Texporter type plugin to go for Truespace-wise?
Campaigns I've added my distinctiveness to-
- Blue Planet: Battle Captains
-Battle of Neptune
-Between the Ashes 2
-Blue planet: Age of Aquarius
-FOTG?
-Inferno R1
-Ribos: The aftermath / -Retreat from Deneb
-Sol: A History
-TBP EACW teaser
-Earth Brakiri war
-TBP Fortune Hunters (I think?)
-TBP Relic
-Trancsend (Possibly?)
-Uncharted Territory
-Vassagos Dirge
-War Machine
(Others lost to the mists of time and no discernible audit trail)

Your friendly Orestes tactical controller.

Secret bomb God.
That one time I got permabanned and got to read who was being bitxhy about me :p....
GO GO DEKKER RANGERSSSS!!!!!!!!!!!!!!!!!
President of the Scooby Doo Model Appreciation Society
The only good Zod is a dead Zod
NEWGROUNDS COMEDY GOLD, UPDATED DAILY
http://badges.steamprofile.com/profile/default/steam/76561198011784807.png

 
Re: A Simple Texturing Tutorial (Warning to dialup users!)
Still confused about the first few steps aldo... progress pics would come in handy  :D
That's cool and ....disturbing at the same time o_o  - Vasudan Admiral

"Don't play games with me. You just killed someone I like, that is not a safe place to stand. I'm the Doctor. And you're in the biggest library in the universe. Look me up."

"Quick everyone out of the universe now!"

 
Re: A Simple Texturing Tutorial (Warning to dialup users!)
Now the glow map tutorial... Don't worry this one is much shorter

Fighter glow maps

Doing glow maps is seperated into two seperate steps: using max and using photoshop.

Heres the model I'm going to be using, its the same one as before but I've added some more texturing and objects to it after the last tutorial.
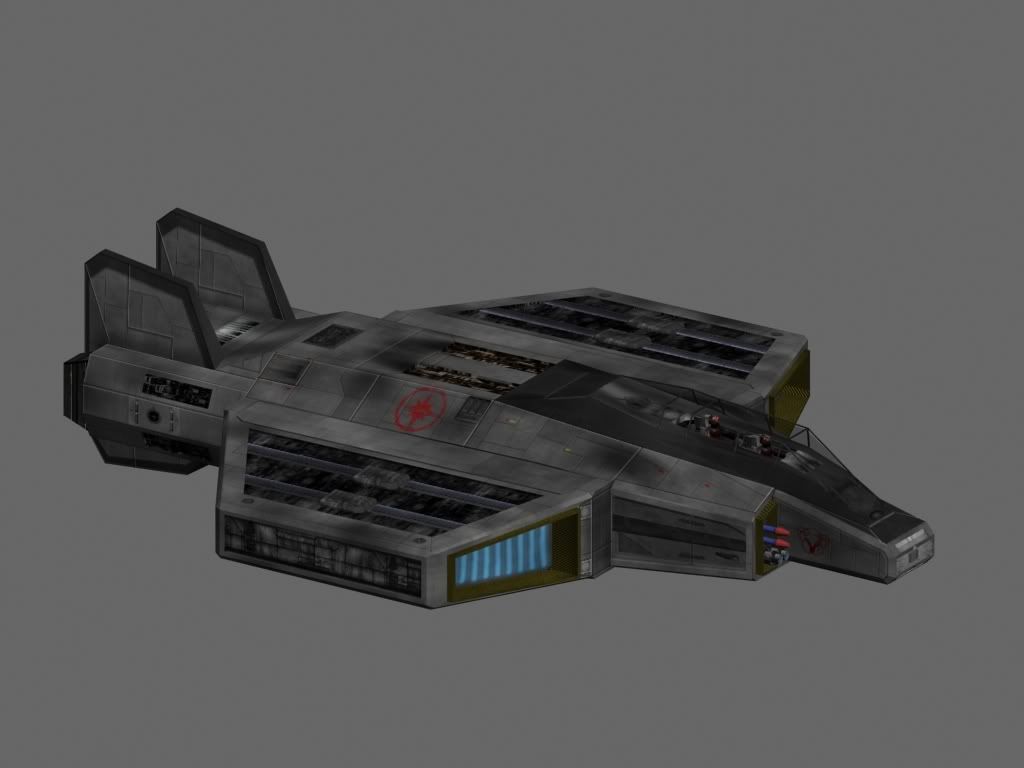


First thing to do is determine where there will areas giving off light.  For fighters it is usually quite simple, for capships it can be more time consuming.  Intakes, floodlamps... etc are all possible examples.  If your doing area spot lights use the target spotlight if your doing areas that just give off glow, use omni lights.

In this example theres only one area that need lighting, the engine intakes, and they both use omni lights.
Because I made life easier for me by using symtery, I only need to do one side of the model. 

For this model I used two omni glow points, set the color to a blueish hue.  Lowered the multiplier down to .5, enabled ray tracing shadows.  Also don't forget to set the scene ambient to pure black and have a pure black background.

Unforunately, Max's real time light rendering isn't very accurate, i.e. no shadowing occurs.  So you'll have to put a few lights on the scene, render it and adjust as needed.
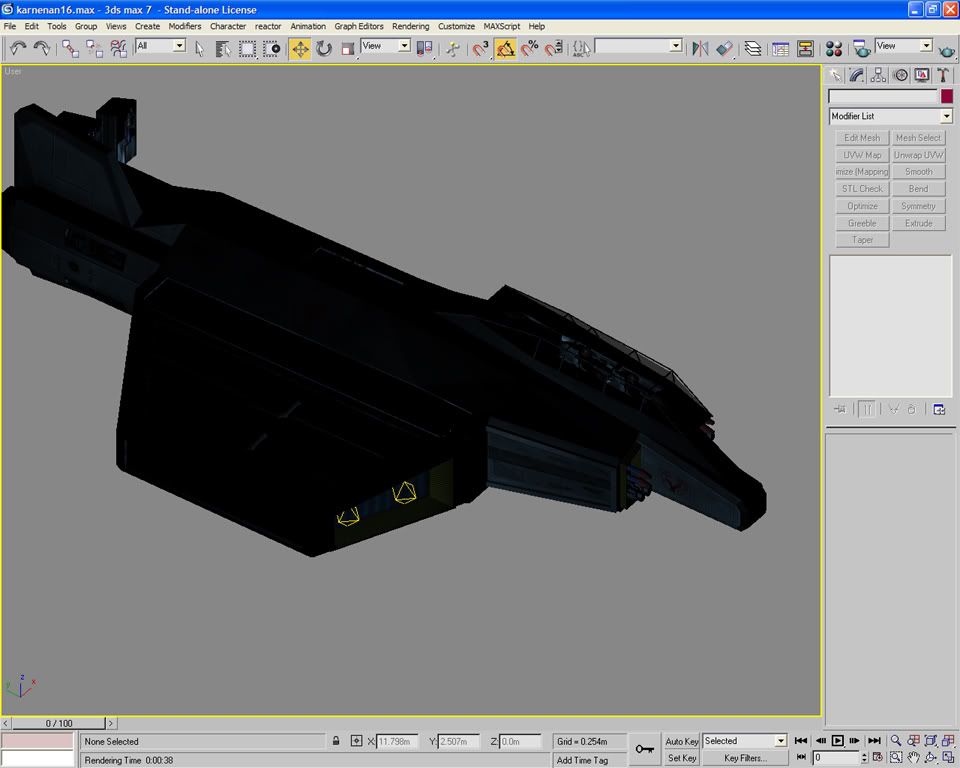

Screen res was lowered for photobucket. Also only half the hull is there, symetry was temporarily disabled.

Heres the rendered result
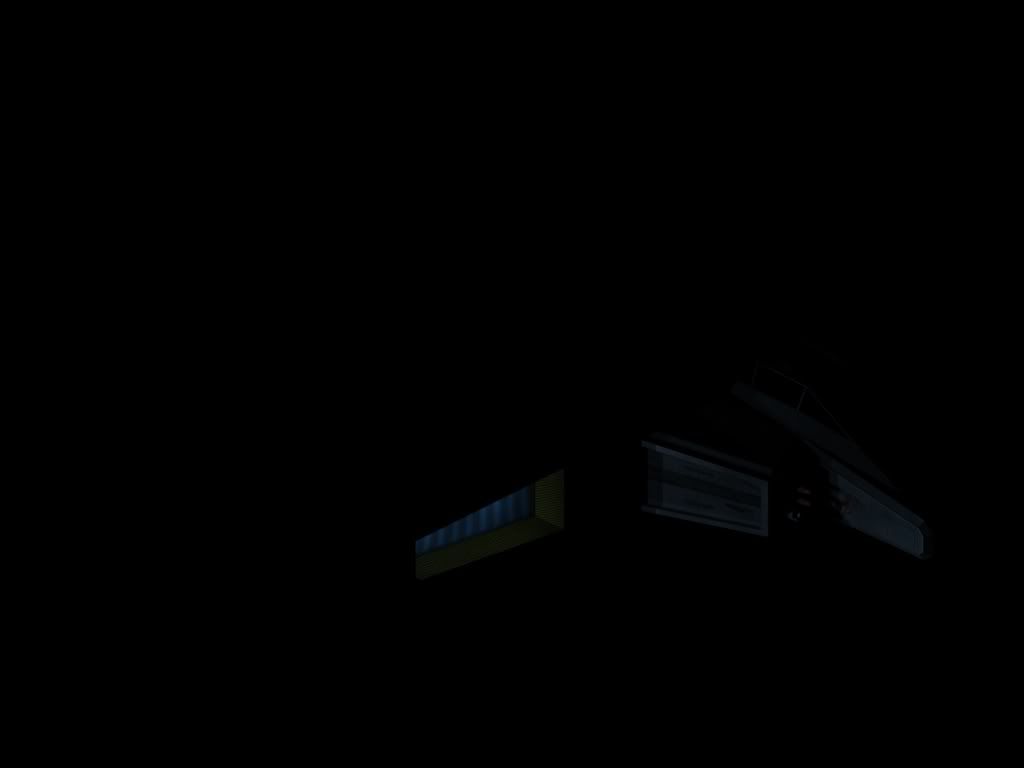
You can't see very much, which is exactly how we wanted it.  Only thing visible is what's getting the lighting from the engine section.

Texture baking Prep.
When you've got all the lighting the way you wanted it we need to prep things for the baking.
The way I do it, you can only bake on object at a time. If you have more than one object using the same texture receiving lighting, you will need to attach them together. And each texture that gets lighting will need to be baked seperately.  Objects that don't get lighting or are using a common texture used for other models don't need to be baked.

For example:
        Object1 is using TextureA
        Object2 is Using TextureB
        Object3 is using TextureA
        Object4 is using TextureC
        Object5 is using TextureE but no lighting.
        Object6 is using the commonly used texture CockpitTexture


You will need to bake 3 times (one for A, B and C).  Object's 1 & 3 will need to be attached to each other. One easy way is to get the lighting the way you want it. Save the file with the lighting.  Attach the objects, bake and don't save the changes.  You'll still have the lighting but the objects won't be attached to each other. (Especially useful if the objects still had their modifer stacks before the merging)

Object5 doesn't get any lighting so theres no need to bake it (the results would be pure black anyways). 
Object6 is using a texture thats used on other models.  If we bake the lighting for this model, then it would not look correct on other models.  The only thing we can really do is do it manually with photoshop, so Object6 doesn't get baked (in the model we're using, this would be the cockpit and guns)

In this case, the entire ship's hull is one object using one texture so it's one baking.

Baking an object
To start the baking, select the first object. Press "0" or Rendering->Render To Texture.
This will bring up the Render to Texture dialog

Basic settings are (most are default):
      Rendered Frame Window : Checked
      Objects to Bake: This should contain the name of the object you selected.  If theres nothing in the list, reselect your object
      Mapping Coordinates: Use Existing Channel!!! Make sure it's use exisitng, if you use automatic it'll redo the uvmap and while the model will
                   look ok, the texture map will be a total unuseable mess
      Output list will be empty.  Click Add then LightingMap Add Elements.
      You will need to replace 256 with the size of the texture, in this case 2048
      Everything else should hopefully be default

Click Render.  You may get a message saying missing map targets just click continue.  Also if you get an file exists simply override the file (we don't be using it anyways)

It will display a User rendering screen. Baking can take several minutes (depending on number of lights and speed of your machine) and most of the map rendered will be black. 

Once it's done rendering, save the resulting image to a bmp.
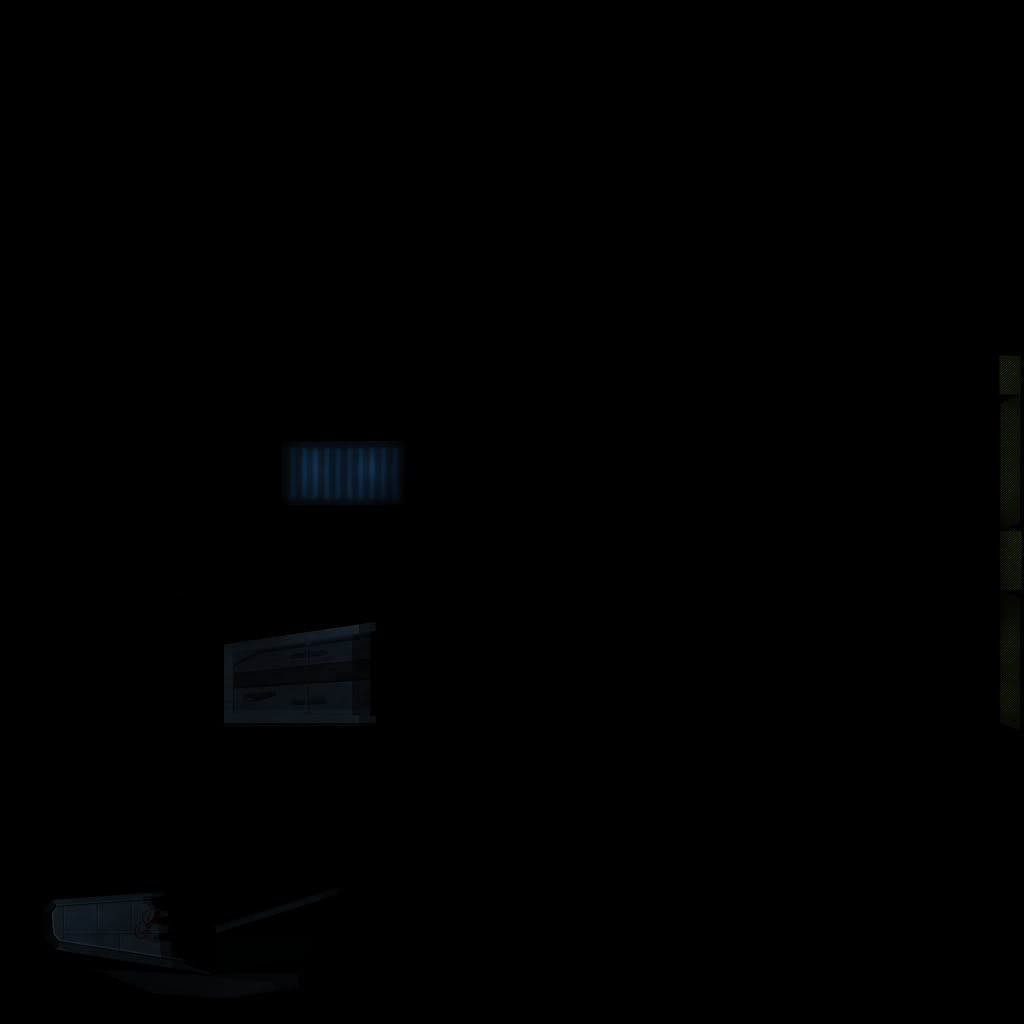

Repeat the baking step for any other textures.

You can close down Max now.  We're done using it.

Finishing up
Now start up photoshop and load the ships texture and the bmp we just created from the baking process.
Select all of the the baked texture and copy and paste it into the ship hull texture.  You'd better not have collapse all those layers!!!
Move any layer that produces a glow (in this case, the engine intakes and the lights on the belly of the ship) on top of the baked layer.  This will give them the fully lite effect. Any other layers that don't give off a glow such as base texture, panel lines, grim, detailing can be deleted to considerably save space/memory a lot of it too)

Save the resulting image to something-glow.psd  (in this case stalker-glow.psd)
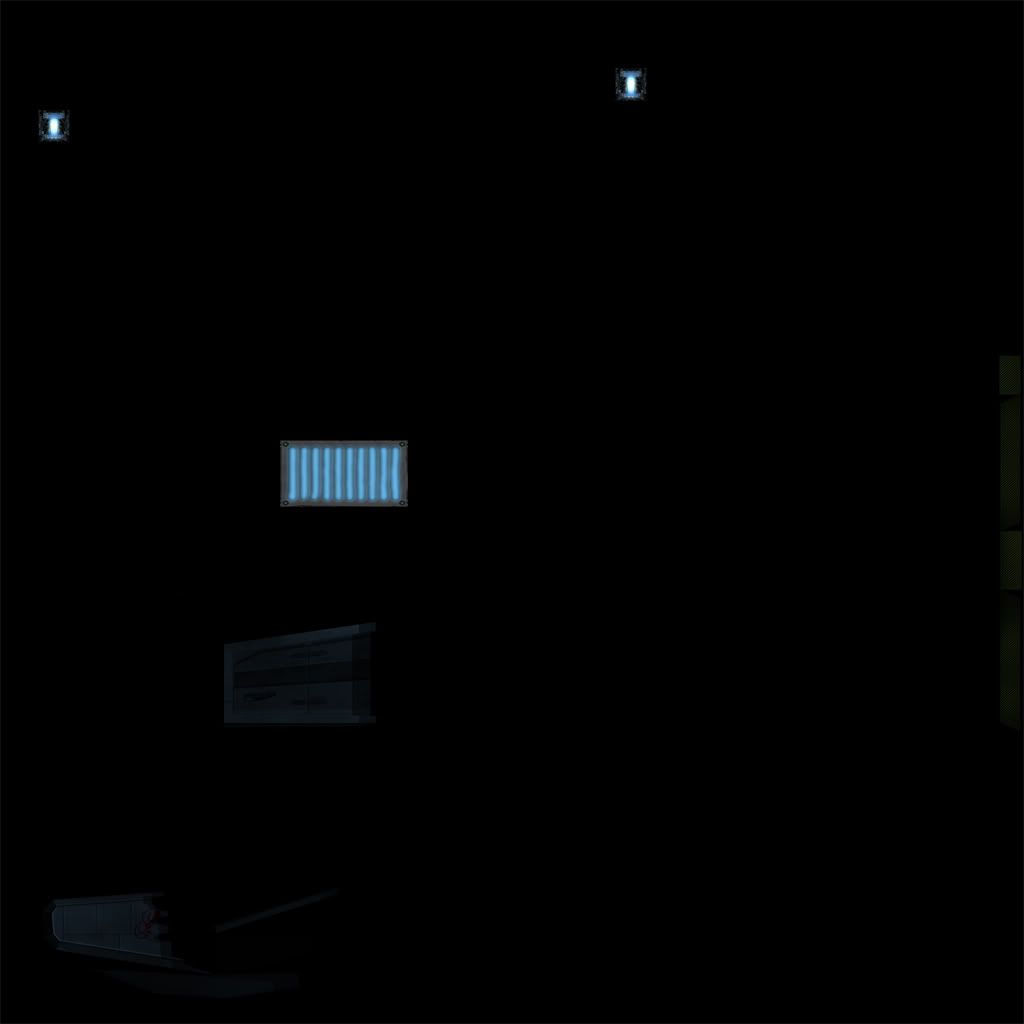

Again if you have more than one baked texture, repeat the photoshop steps for the other textures.

All done  :)

Optional
You can then add the glow map to the model (it's Self-Illumination on the material editor) and delete the original glow points you added and setup the model, add whatever, background, etc... and include at min one light (to activate lighting in max)
Render a show-off pic.
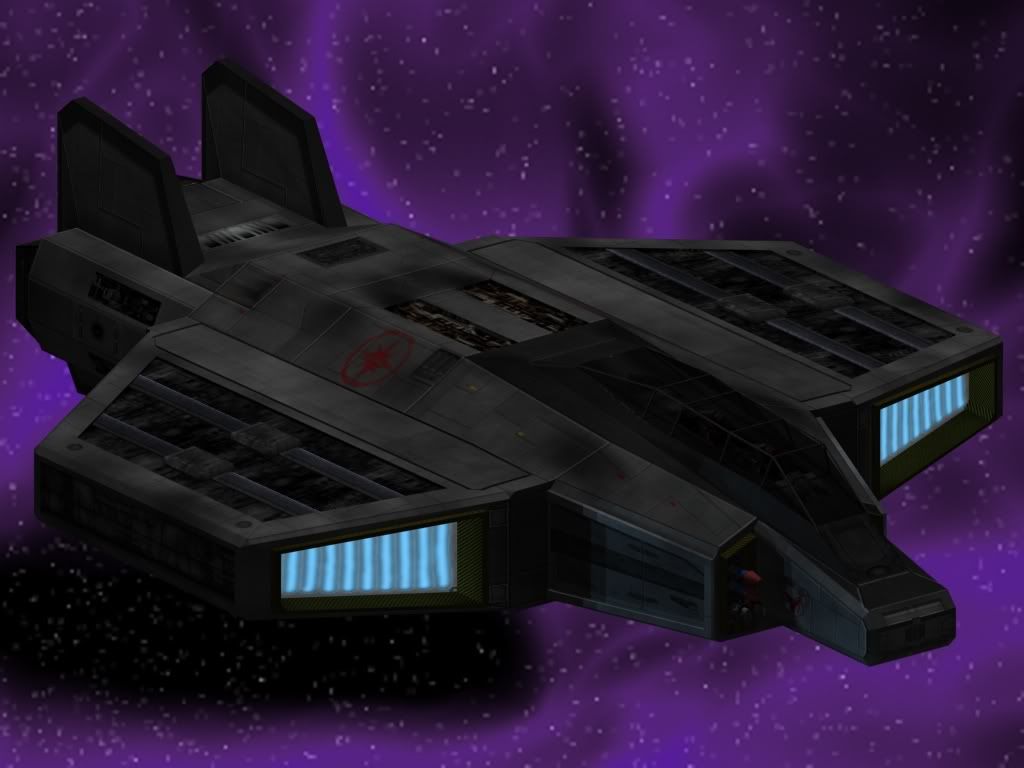
That's cool and ....disturbing at the same time o_o  - Vasudan Admiral

"Don't play games with me. You just killed someone I like, that is not a safe place to stand. I'm the Doctor. And you're in the biggest library in the universe. Look me up."

"Quick everyone out of the universe now!"


Offline Vasudan Admiral

  • Member
  • 211
    • Twisted Infinities
Re: A Simple Texturing Tutorial (Warning to dialup users!)
Now that is a cool way to do glowmaps. Awesome stuff. :D :yes:

One thing I would suggest with that texturing style is to try and lessen the contrast between the recessed mechanical parts and the hull - it's really strong ATM in terms of texture detail & shading as well as brightness.
Get the 2014 Media VPs and report any bugs you find in them to the FSU Mantis so that we may squish them. || Blender to POF model conversion guide
Twisted Infinities

 
Re: A Simple Texturing Tutorial (Warning to dialup users!)
I'm still eagerly waiting for bumpmapping  :D
that should help solve that problem.

That's cool and ....disturbing at the same time o_o  - Vasudan Admiral

"Don't play games with me. You just killed someone I like, that is not a safe place to stand. I'm the Doctor. And you're in the biggest library in the universe. Look me up."

"Quick everyone out of the universe now!"


Offline Colonol Dekker

  • HLP is my mistress
  • 213
  • Aken Tigh Dekker- you've probably heard me
    • My old squad sub-domain
Re: A Simple Texturing Tutorial (Warning to dialup users!)
Nice technique again, Aldo likes Confed?

Yay!
Campaigns I've added my distinctiveness to-
- Blue Planet: Battle Captains
-Battle of Neptune
-Between the Ashes 2
-Blue planet: Age of Aquarius
-FOTG?
-Inferno R1
-Ribos: The aftermath / -Retreat from Deneb
-Sol: A History
-TBP EACW teaser
-Earth Brakiri war
-TBP Fortune Hunters (I think?)
-TBP Relic
-Trancsend (Possibly?)
-Uncharted Territory
-Vassagos Dirge
-War Machine
(Others lost to the mists of time and no discernible audit trail)

Your friendly Orestes tactical controller.

Secret bomb God.
That one time I got permabanned and got to read who was being bitxhy about me :p....
GO GO DEKKER RANGERSSSS!!!!!!!!!!!!!!!!!
President of the Scooby Doo Model Appreciation Society
The only good Zod is a dead Zod
NEWGROUNDS COMEDY GOLD, UPDATED DAILY
http://badges.steamprofile.com/profile/default/steam/76561198011784807.png


Offline aldo_14

  • Gunnery Control
  • 213
Re: A Simple Texturing Tutorial (Warning to dialup users!)
Still confused about the first few steps aldo... progress pics would come in handy  :D

I'd post up a PSD if I could find one under a few hundred meg in size.  It's been ages since I modelled anything, so if I ever get round to it I'll take some snapshots.

Anyways, to try and clarify;

1/ you have a black and white wireframe; divvy it up into coloured regions (like light grey wings, darker grey hull, etc); really basic, and effectively detailless :)

2/Use low opacity black and white paintbrush (large brush size) to apply subtle colour highlights of light->dark etc.  Apply photoshop noise, then photoshop motion blur (this creates a nice 'grain' base). 

3/Add colours on top; that is, use a colour-layer to add red regions, blue regions, etc.  I do this here because it's easier if I want to change the overall colour balance of the texture.

(I work on a general principle that no 2 adjacent pixels should be the exact same colour)


Offline Col. Fishguts

  • voodoo doll
  • 211
Re: A Simple Texturing Tutorial (Warning to dialup users!)
not bad, but i must ephasize the usage of the noise and motion blur filters together to create metallic textures.

Hey, the results of that simple method are stunning :yes:  Creates great metallic base layers.
"I don't think that people accept the fact that life doesn't make sense. I think it makes people terribly uncomfortable. It seems like religion and myth were invented against that, trying to make sense out of it." - D. Lynch

Visit The Babylon Project, now also with HTL flavour  ¦ GTB Rhea